2022年の新作としてノースフェイスから複数のテントやシェルターが発売されました。
その中でも人気モデルのひとつが「Lander2(ランダー2)」です。
ノースフェイスのテントといえば「ジオドーム」のイメージが強くて、やや個性的すぎる印象で僕は今まで敬遠していましたが、ランダー2のデザインには惚れてしまい購入しました。
この記事では、ランダー2を実際に使った感想を詳しくレビューしていきます!

ザ・ノースフェイス「ランダー2」の基本スペック
| カラー | ニュートープグリーン |
| 収容人数 | 2人 |
| 使用サイズ | 335×220×140(h)cm |
| 収納サイズ | 21×56×21cm |
| 重量 | 約5.07kg |
| 素材 | キャノピー:75Dポリエステルタフタ フロア:150Dポリエステルオックス (10,000mmPUコーティング) フライシート:75Dポリエステルタフタ (2,000mmPUコーティング) |
| 付属品 | 収納バッグ フライシート インナーテント ポール×3本 ガイライン×6本 ペグ×15本 |
| 参考価格 | ¥44,000(税込) |

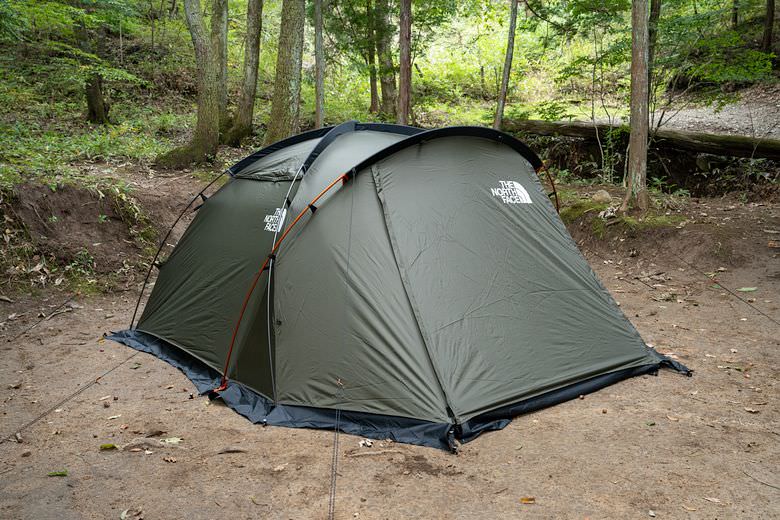
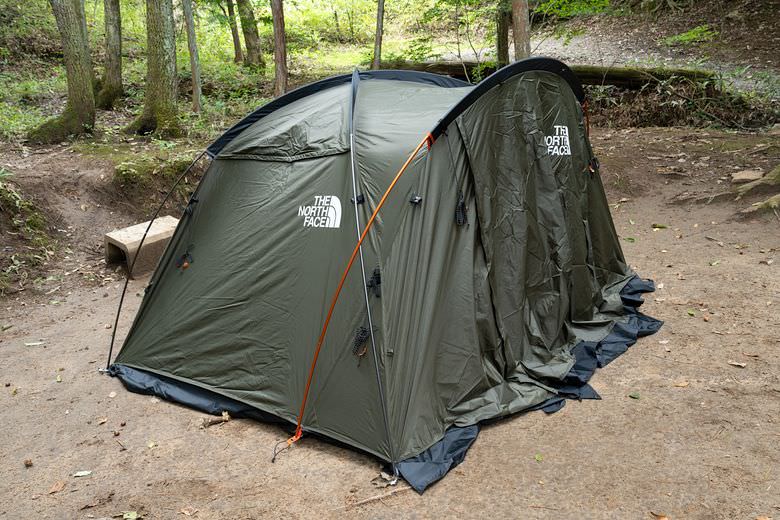
ランダー2は1~2人用のドームテントです。
ニュートープグリーンはノースフェイスのアパレル好きにはお馴染みのカラー名ですね。
2人が余裕を持って寝れるインナーテントに加えて広めの前室もあるため、居住空間が広いのが特徴です。
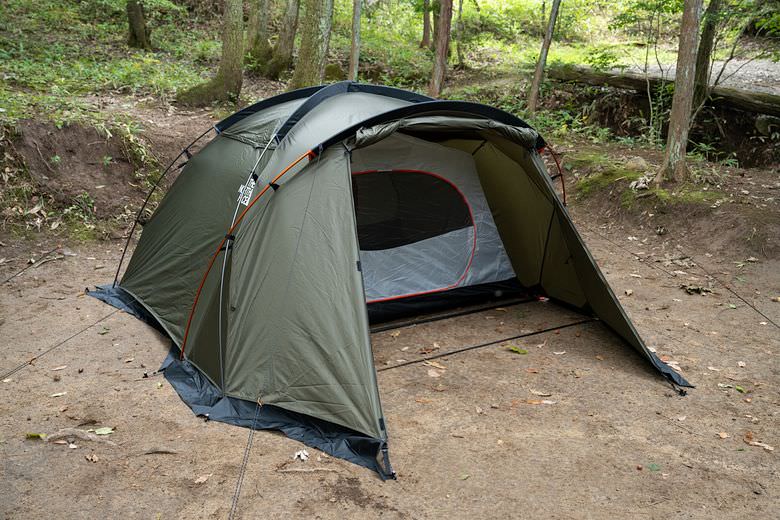
パッと見はちょっと広めのシンプルな前室付きドームテントですが、アウトフレーム構造のおかげでインナーを取り外して使えるのが大きなメリットです。
 たろー
たろー僕はこのメリットに魅力を感じて購入しました!後で詳しく解説します!
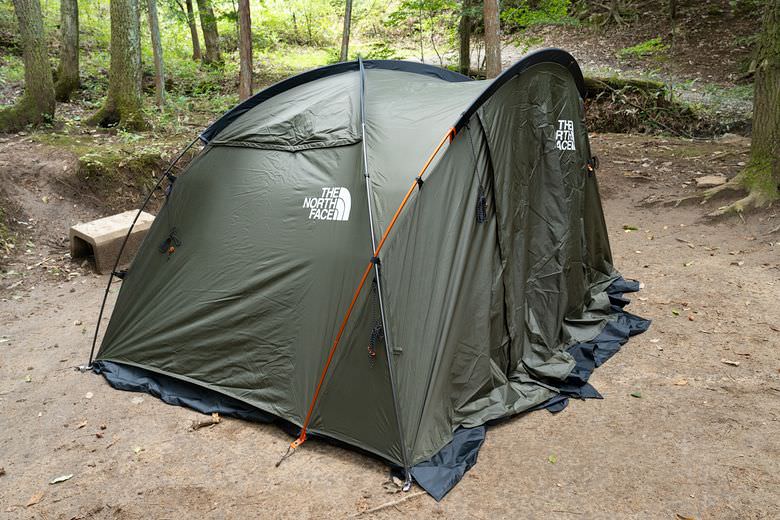
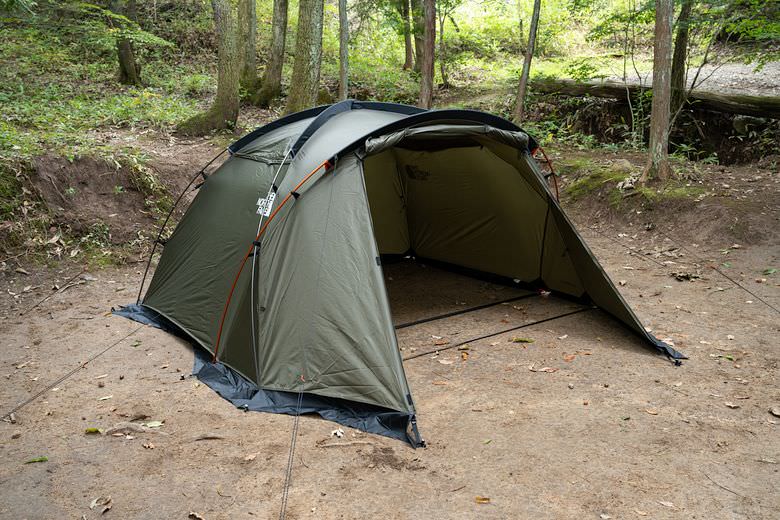
ザ・ノースフェイス「ランダー2」の設営方法・外観
まずは設営方法と外観を紹介します。
内容物
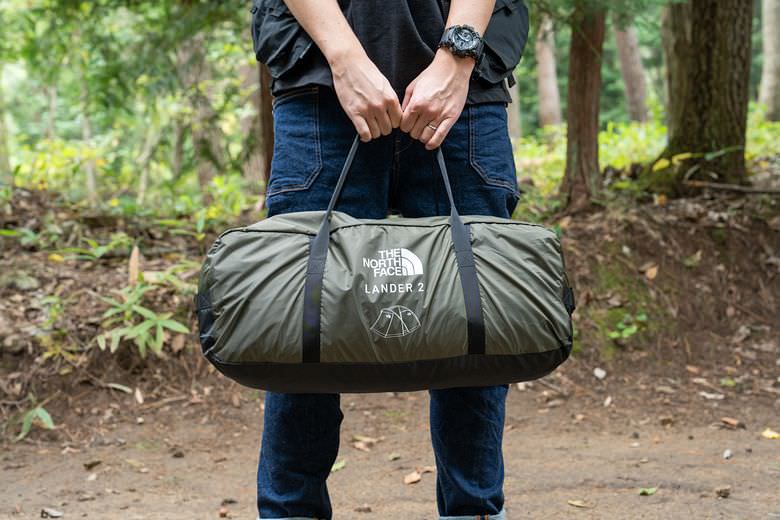
収納バッグは幕体と同じニュートープグリーンでカッコいいです。
サイズも比較的コンパクトですね。
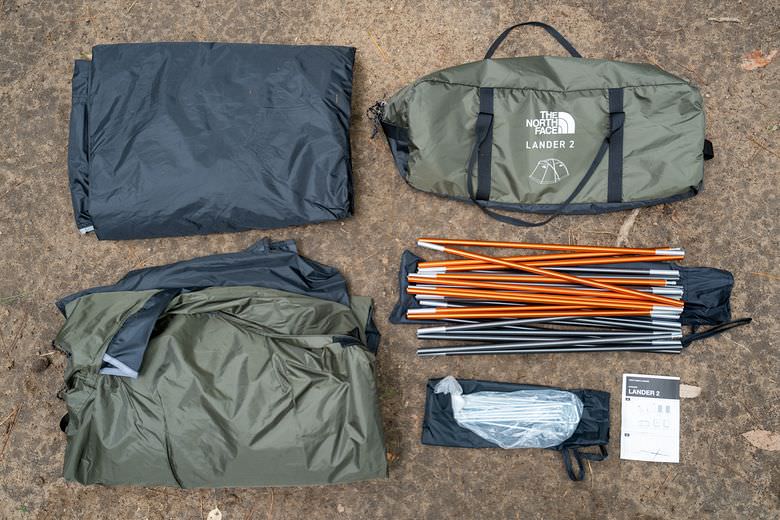
内容物はこちら。
- 収納バッグ
- フライシート
- インナーテント
- ポール×3本(グレー×2/オレンジ×1)
- ガイロープ×6本(フライシートに装着済み)
- ペグ×15本
- 取扱説明書
たろー例のごとく付属ペグは微妙なので使いません!僕はソリステで設営します!

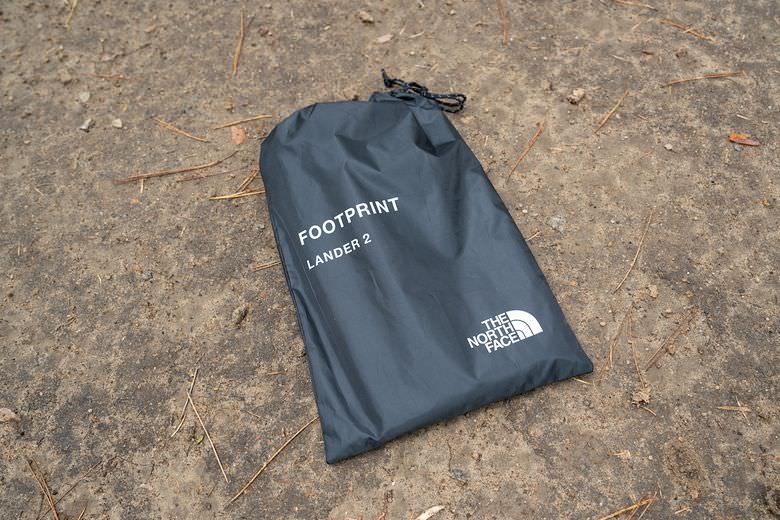
なお、別売りでインナーテントの専用フットプリントも発売されています。
たろー僕はこちらも購入しました!

設営方法
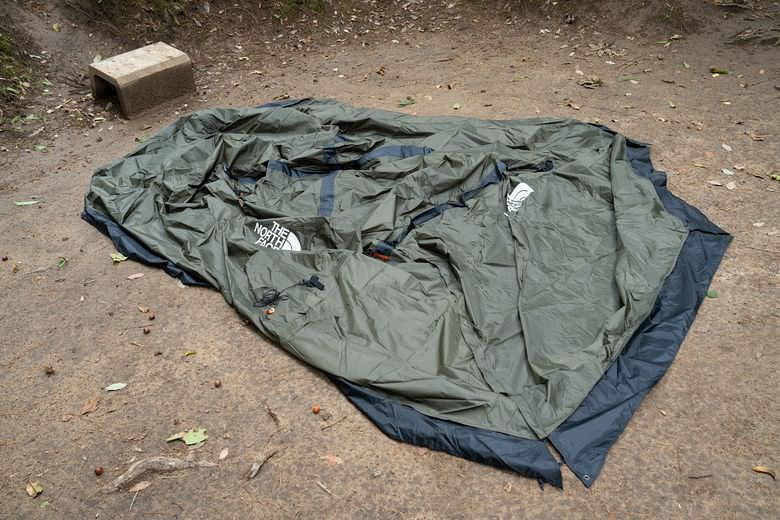
まずはフライシートを広げます。

次にポールを3本組み立てます。
ポールにはショックコードが通っているため簡単に組み立てられますよ。
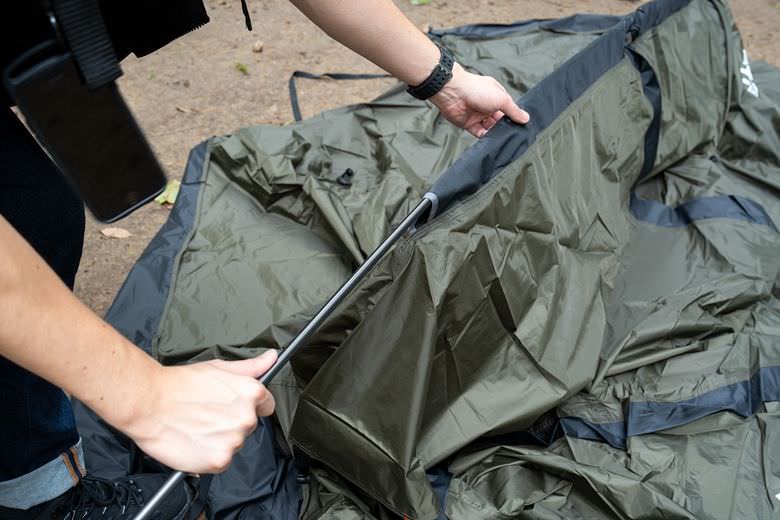
グレーのポールをスリーブに通します。
ポールのカラーにスリーブのカラーが対応しているので迷いません。
グレーのポール2本をこのようにクロスさせるように通します。
2本のポールの両端をフライシートのグロメットに差し込みます。
グロメットのカラーもポールのカラーに対応しています。
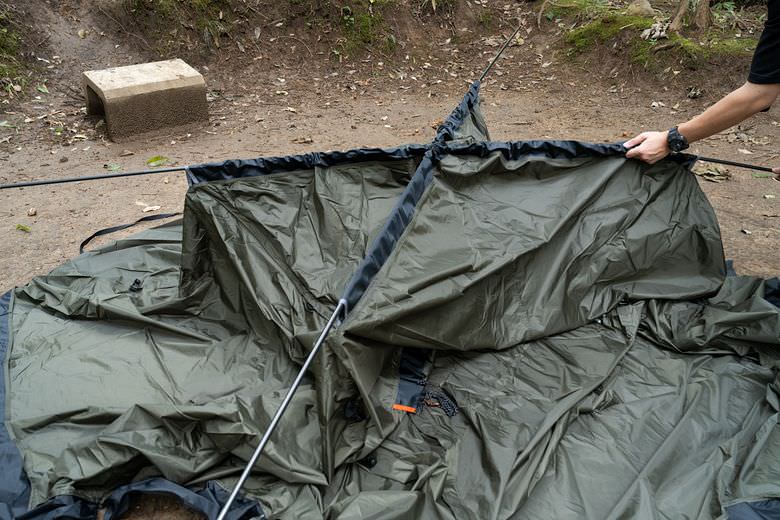
グレーのポールを張ると幕が自立します。

続いて、オレンジのポールを幕の前面のスリーブに通します。
ここもスリーブがオレンジなのでわかりやすいです。
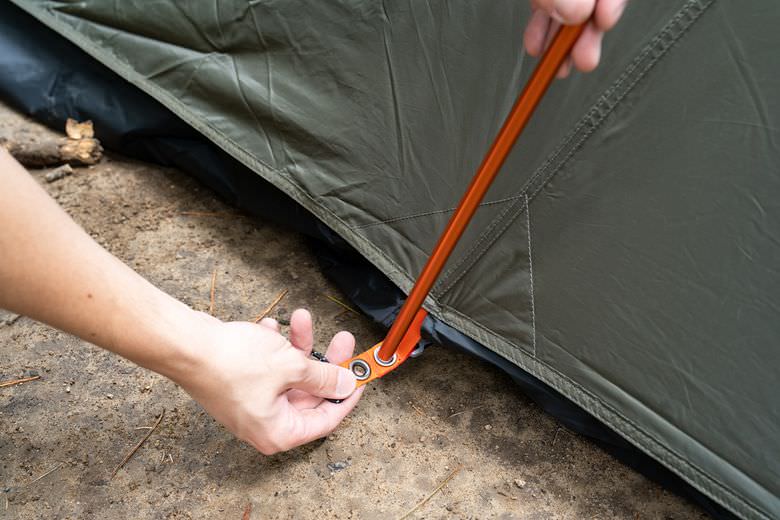
オレンジのポールの両端もグロメットに差し込みます。
オレンジのポールも張るとこうなります。
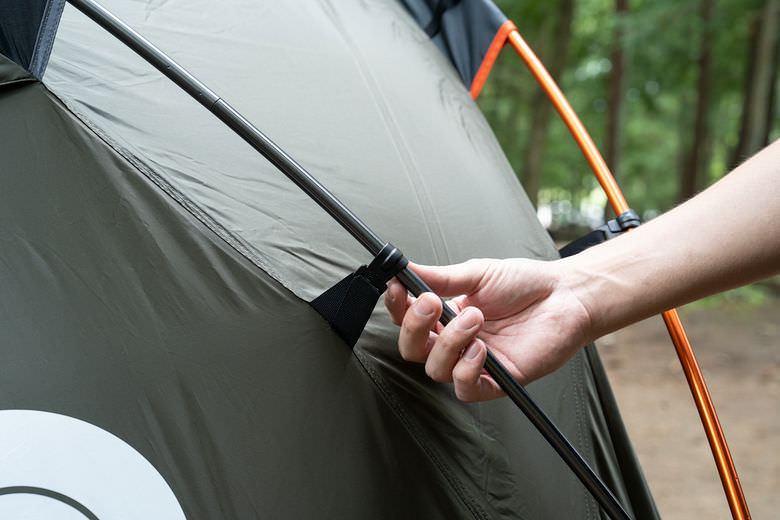
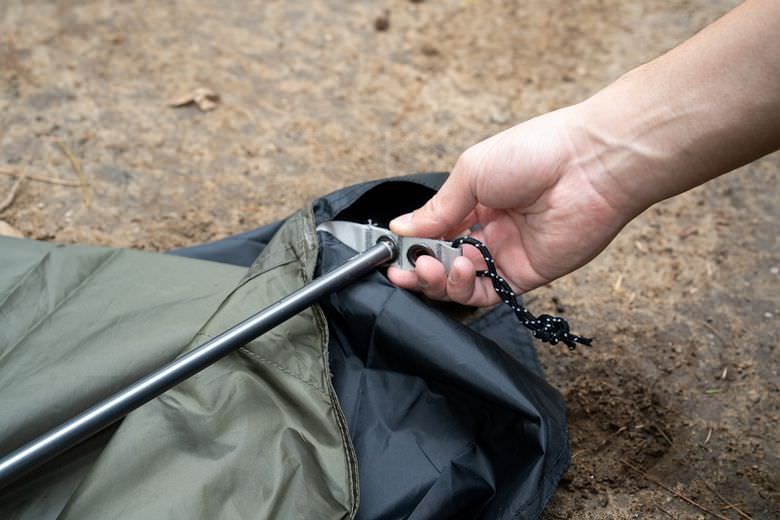
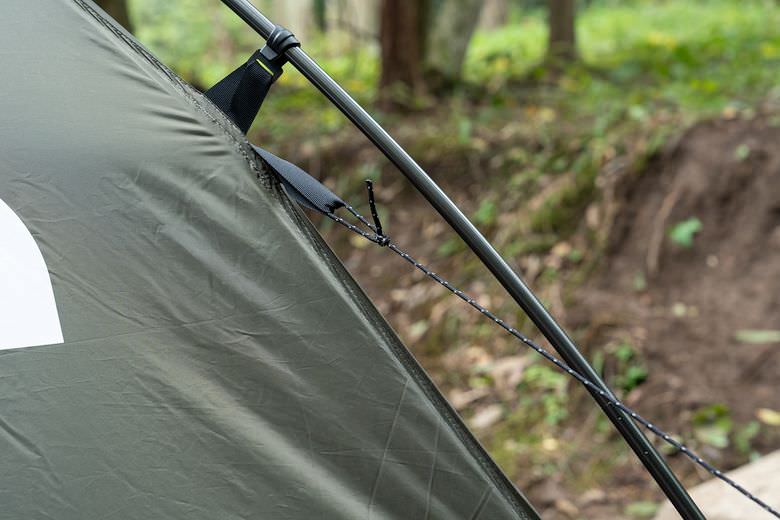
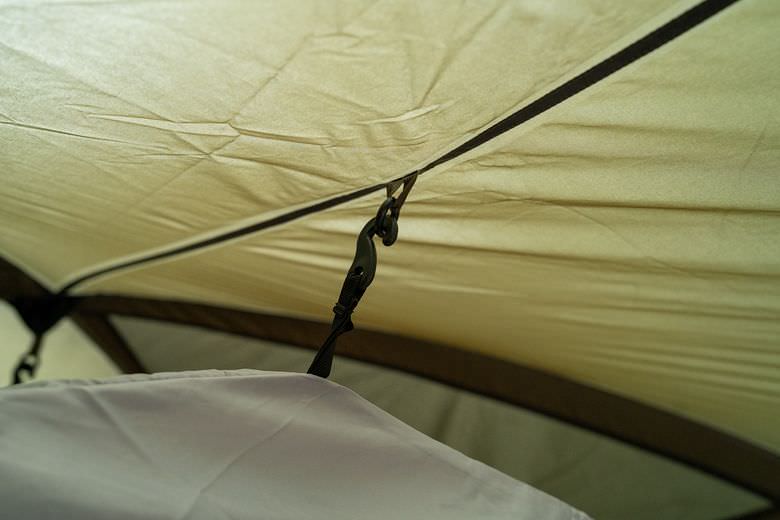
続いて、フライシートに付いているフックをポールにパチパチ引っかけていきます。
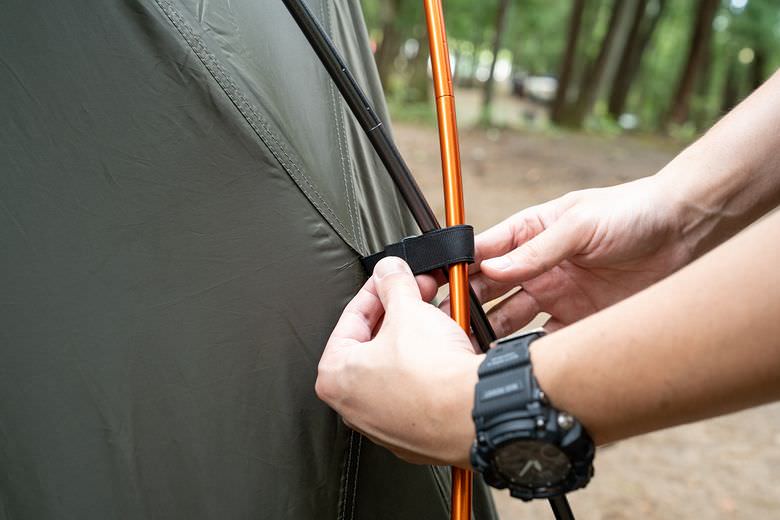
グレーとオレンジのポールがクロスしている部分は面ファスナーで固定します。
これでポールの固定も完了しました。
なお、この状態だとまだテントを動かせるので設営場所の微調整ができます。
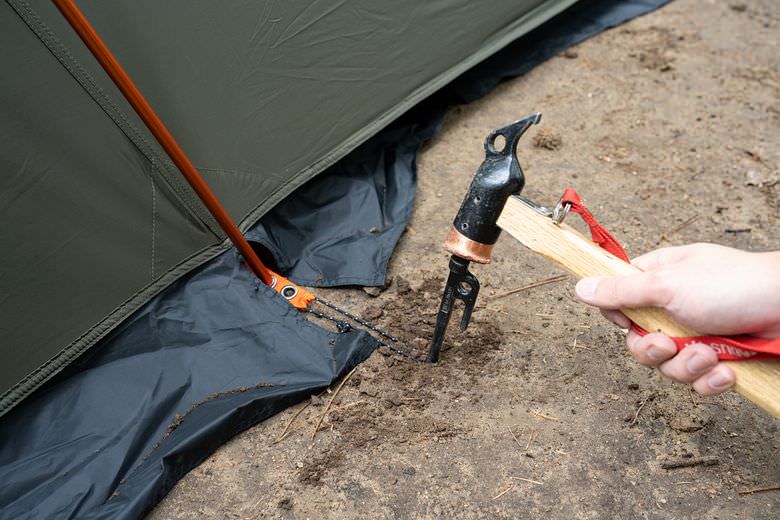
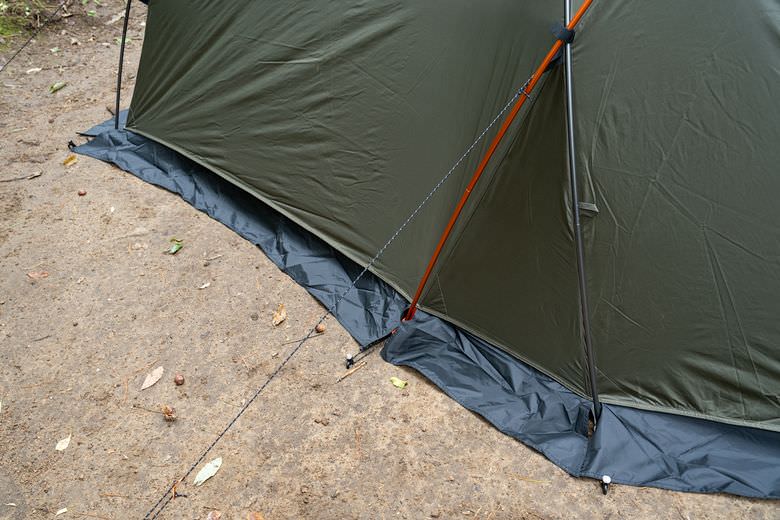
次にボトムを9箇所ペグダウンします。
ポールの根元6箇所、前室の両端2箇所、後室の先端1箇所です。
フライシートに元からガイラインが6箇所装着されているため、これも伸ばしてペグダウンしていきます。
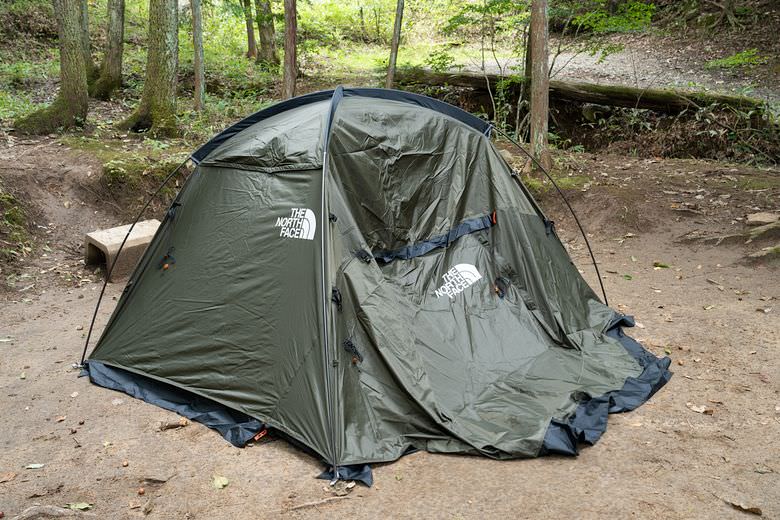
これでフライシートの設営は完了です。
前面をロールアップするとこんな感じ。
付属はしませんが、ポールを使えばキャノピー部分の跳ね上げも可能です。
たろー後ほどレビュー部分で跳ね上げた写真もあります!
続いてインナーテントを装着していきましょう。

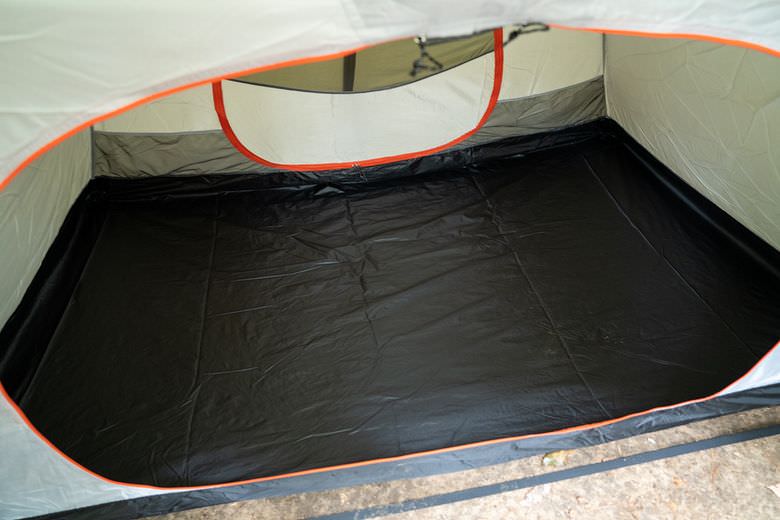
まずは別売りのフットプリントを敷きます。
専用設計だけあってジャストサイズで気持ち良い。
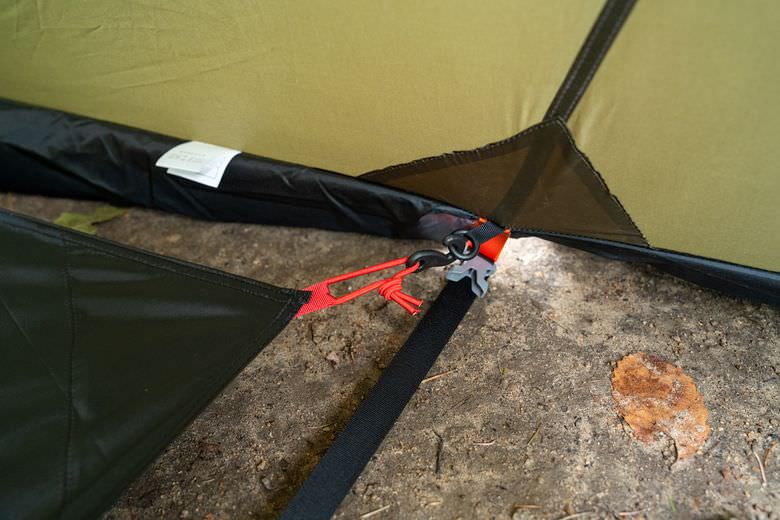
しかもフットプリントは四隅にフックが付いていて、幕内にはそれを引っかけるためのループが付いています。
このおかげで、フットプリントは簡単にベストポジションに敷けます。
たろーこの仕様には感動しました!フットプリントはちょっと高いけど絶対に純正を推奨します!
続いてインナーテントを装着していきます。

インナーもボトムの四隅をバックルで留められる仕様になっています。(グレーの部分。)
ボトムをバックルで固定したら、幕内のループにインナーのフックを全箇所吊るしていきます。
吊るしたらボトム四隅のバックル部分のアジャスターを調整すれば弛みを減らせます。
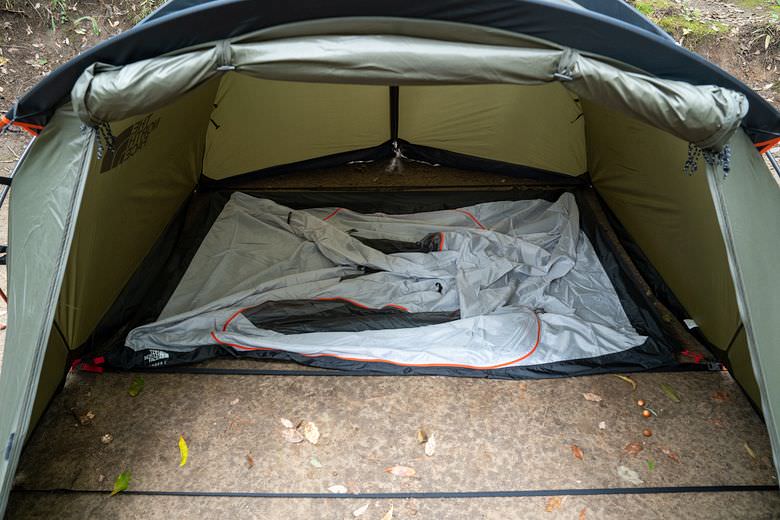
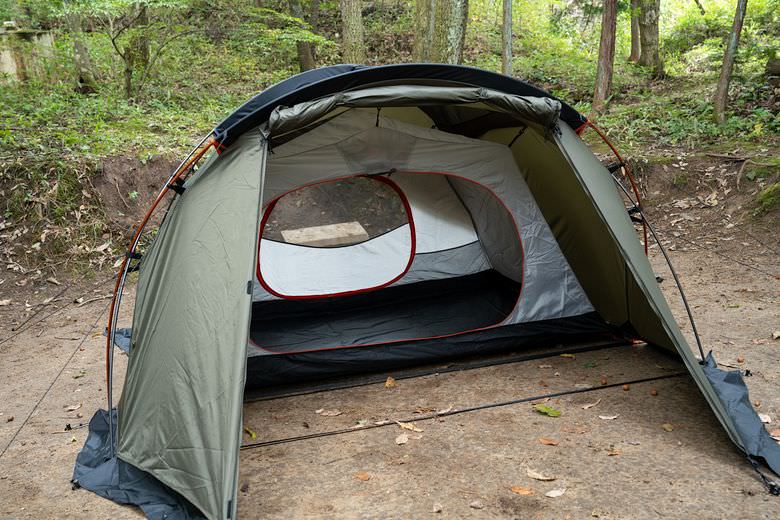
これでインナーテントの装着が完了です。
俯瞰で見るとこんな感じ。
インナーの室内空間は大人2人が余裕を持って寝れる広さがあります。
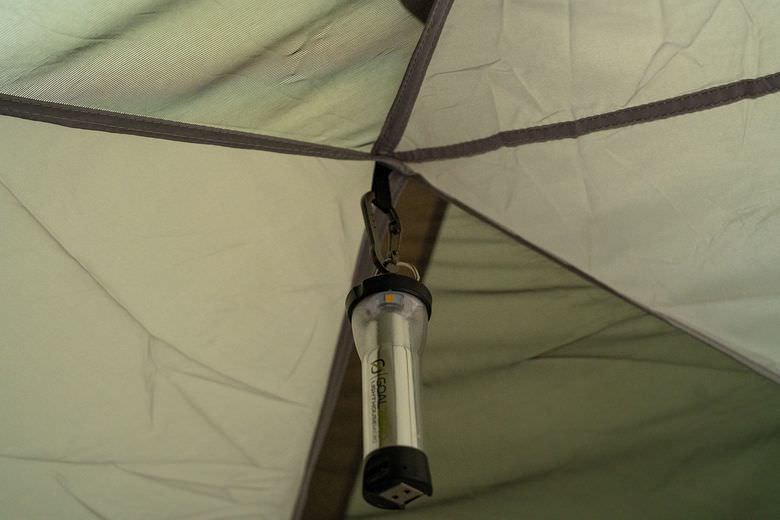
天井にはもちろんランタンループもあり。

スマホなどの小物を収納できるポケットが四隅に付いています。
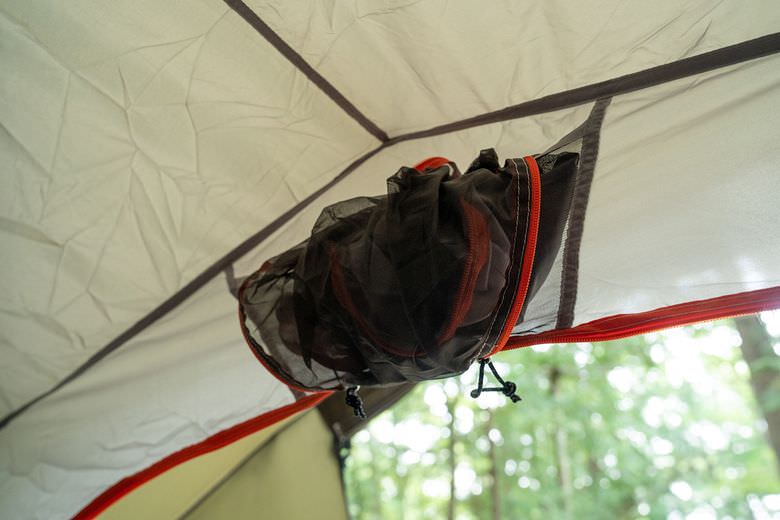
出入り口の上部には開放時にドアを収納できるドアポケットも付いています。
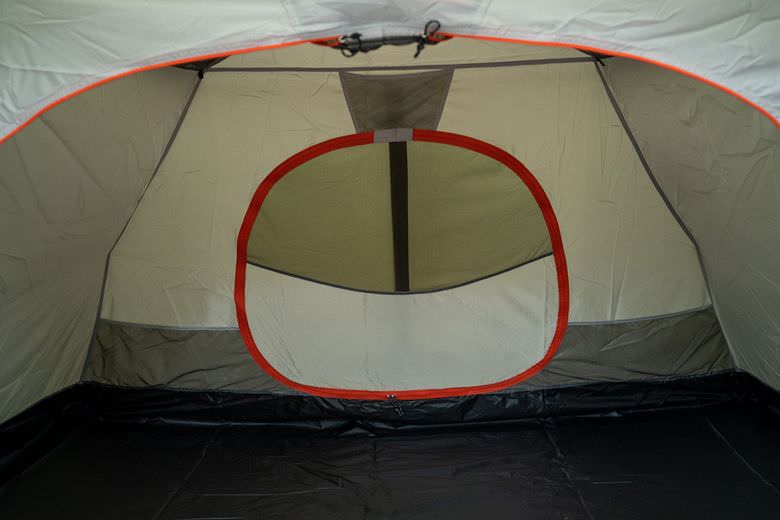
インナーは前後の2ヶ所が開く仕様で、
後室も開放できるのでテントの後ろ側からも出入りすることが可能です。
こうすれば通気性も高まって夏場も快適ですね。
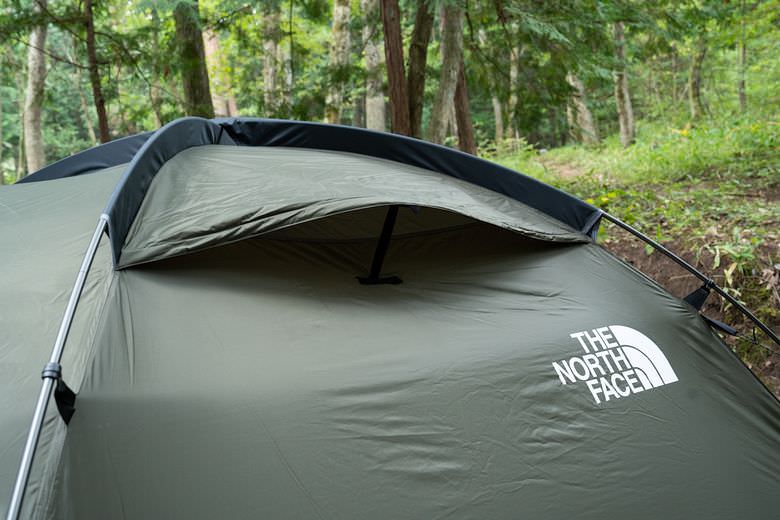
なお、フライシートの上部は両サイドにベンチレーションがあってさらに通気性を高められます。
たろー設営方法と外観の紹介はこんな感じ!
ザ・ノースフェイス「ランダー2」のメリットをレビュー
ここからは、ランダー2を実際に使って感じたメリットを紹介していきます。
- 見た目がカッコいい
- 居住空間が広い
- アウトフレーム構造でシェルターとしても使える
- オールシーズン対応
たろーそれぞれ詳しく見ていきましょう!
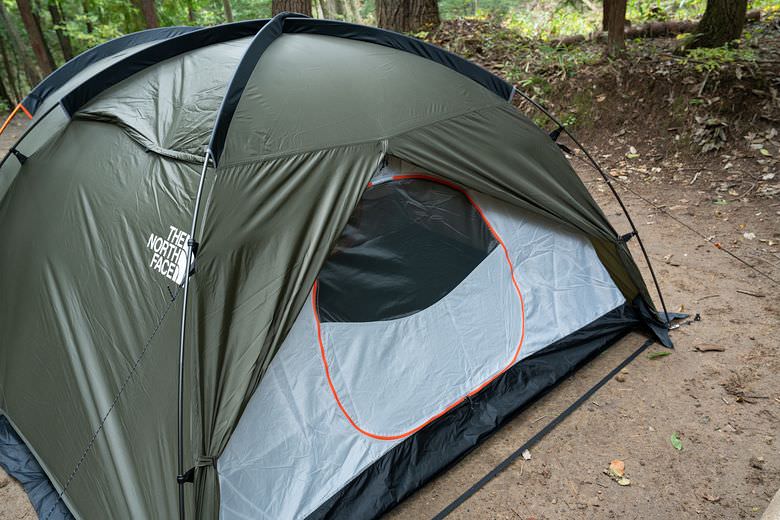
見た目がカッコいい
まず、なんと言っても見た目がカッコいいですね。
テントは言わずもがなキャンプサイトで一番目立つ存在なので、なによりデザインが気に入らないと使う気が起きません。
ランダー2はニュートープグリーンのミリタリーな雰囲気が男心をくすぐって一目惚れしました。
後ほどデメリット部分でも話す通り、僕の好みとしては惜しい部分もありますが、基本的なデザインは非常にカッコいいテントだと思います。
たろー僕のお気に入りのギアたちとの相性も抜群!
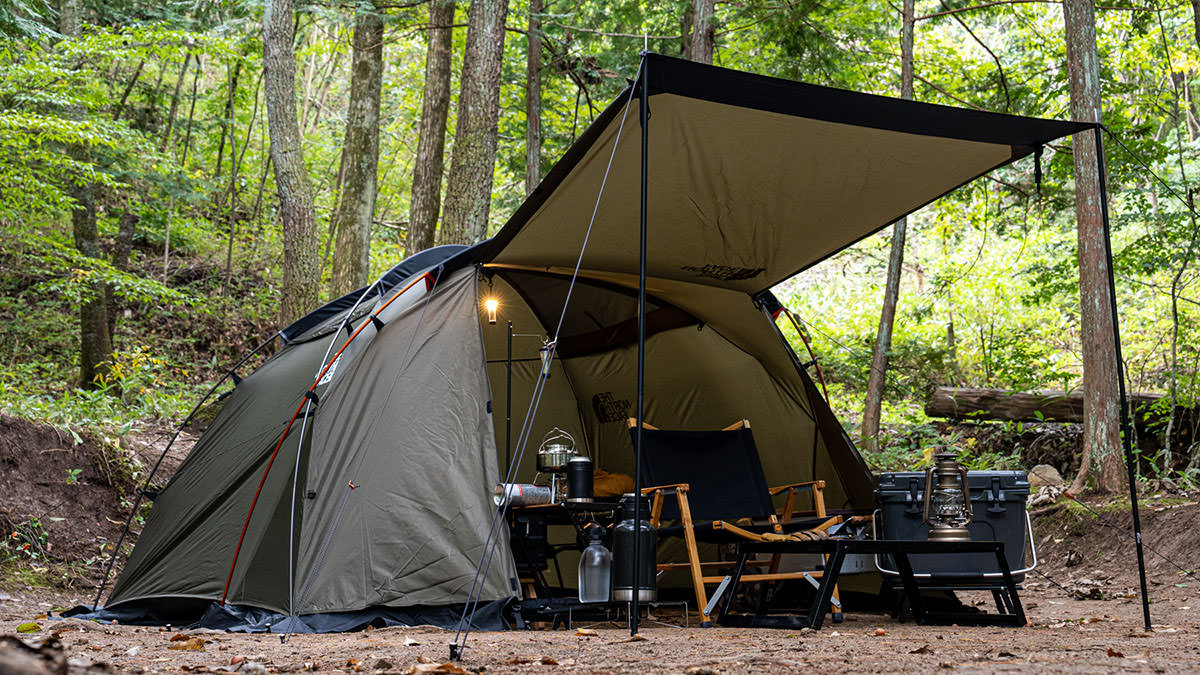
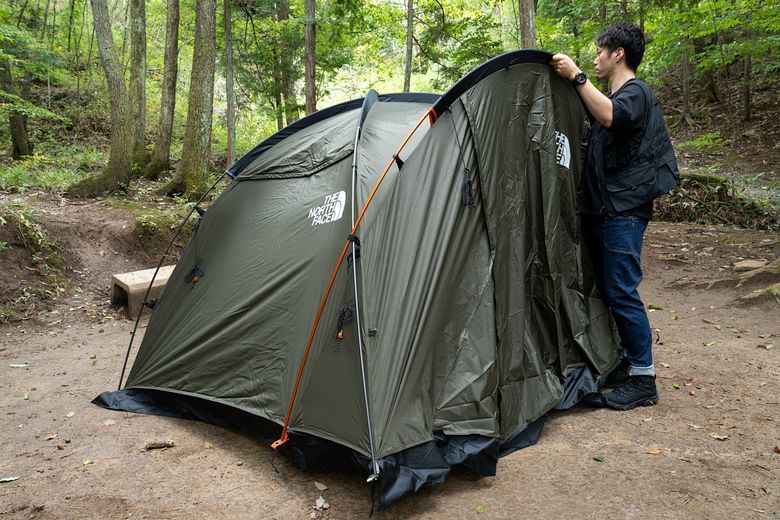
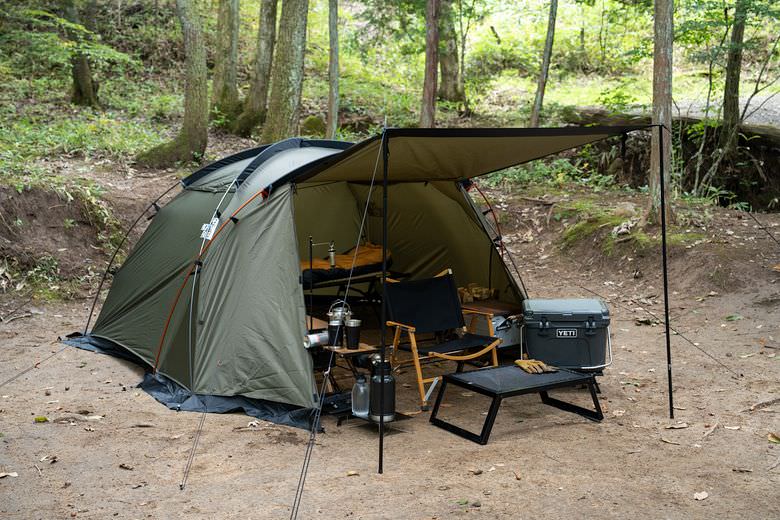
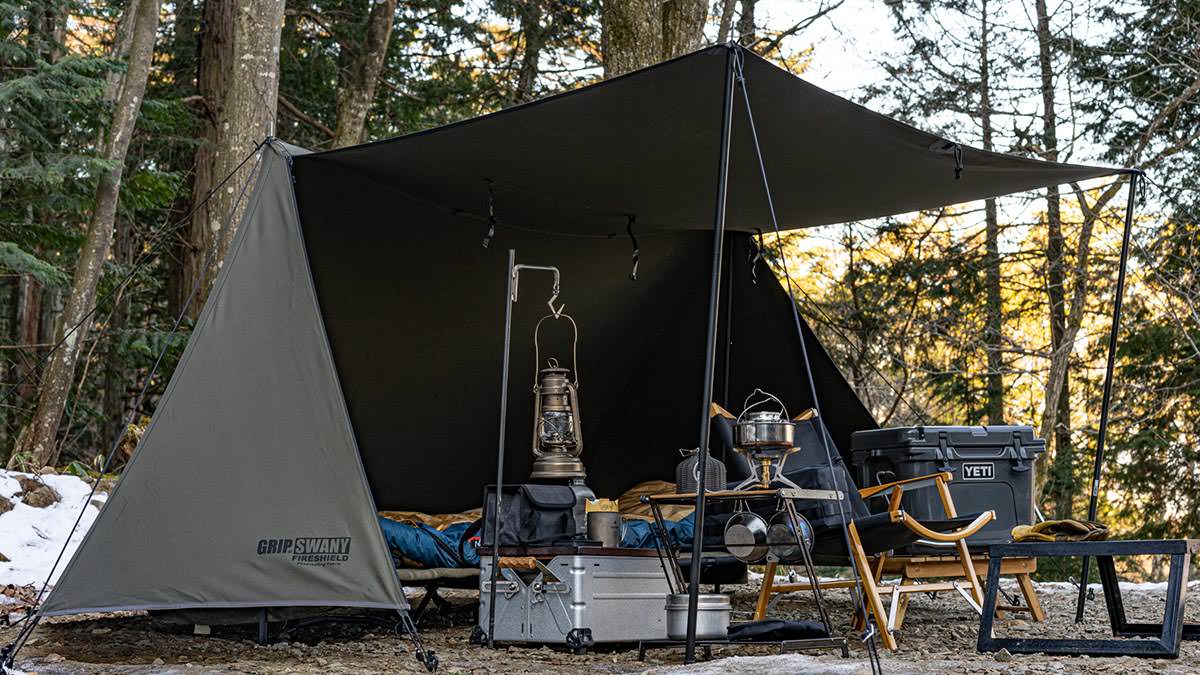
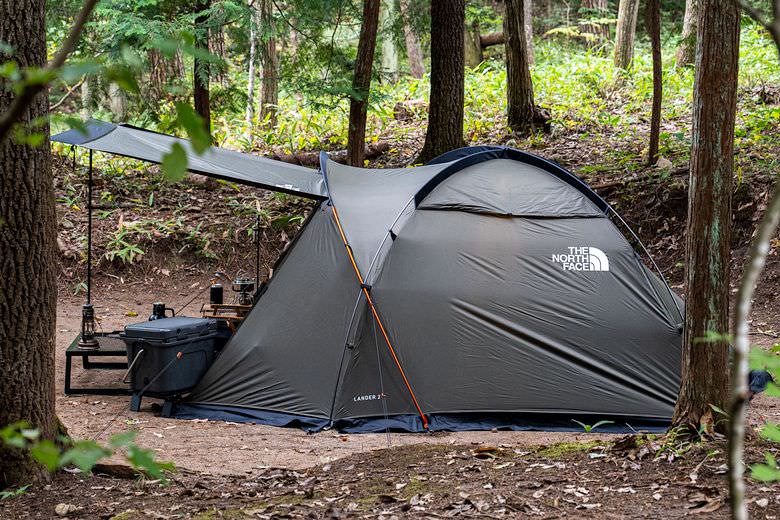
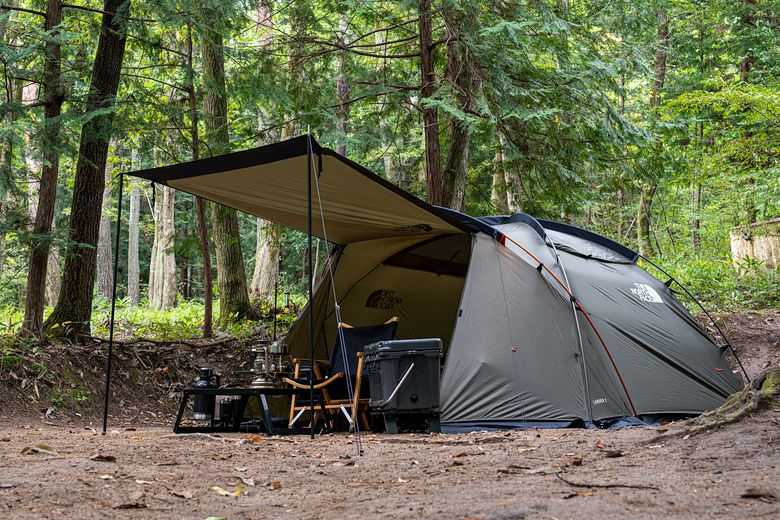
そして、こういうテントはやっぱりキャノピーを跳ね上げてなんぼですね。
跳ね上げ用のポールは付属していないため、僕はフィールドアのポールを使用しています。

ガイロープも別途必要です
居住空間が広い
ランダー2は最大2人用のテントとして各部の居住空間が広いのも大きなメリットです。
インナーテント
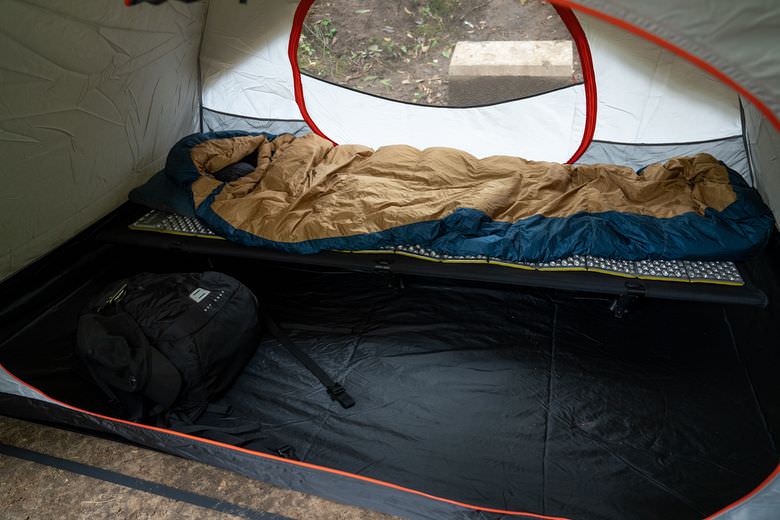
インナーテントのフロアサイズは220×140cmなので、コット1台と荷物を置いてもまだまだ余裕があります。
ソロキャンプなら快適すぎる広さです。
そして、一般論としてテントで快適に過ごせる人数は「スペック上の対応人数-1人」と言われますが、ランダー2はスペック通り大人2人でも快適に寝れる広さがあります。
例えばコールマンのツーリングドームSTも対応人数の表記は1~2人ですが、インナーのフロアサイズは210cm×120cmで大人2人だとかなり窮屈です。
そのため、ツーリングドームSTは「基本ソロ用で2人もギリいける」程度で、デュオキャンプメインの人にはおすすめできません。
対してランダー2は「ソロなら超快適だし2人でも快適」な広さがあって、2人で使うことが多い場合にもおすすめできます。
たろーツーリングドームSTと比べてインナー幅+20cmが大きいです!
なお、一般的な2WAYコットは幅が65~68cm程度なので、荷物を置くスペースはなくなりますがコット2台もギリギリ入ります。
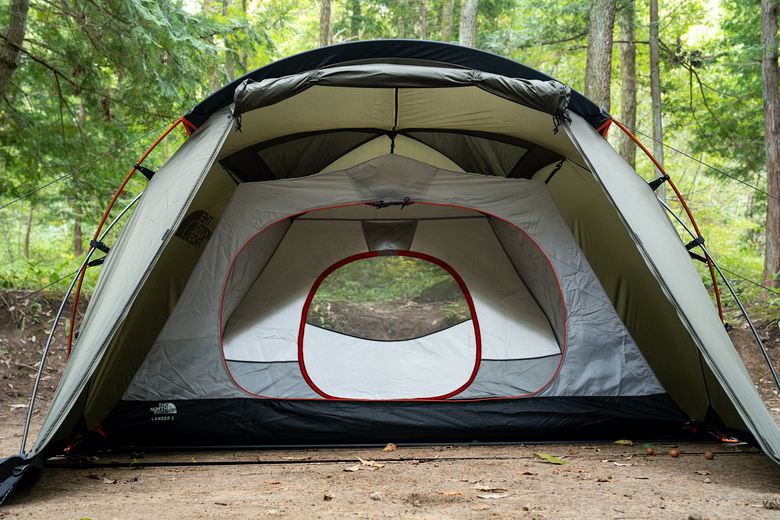
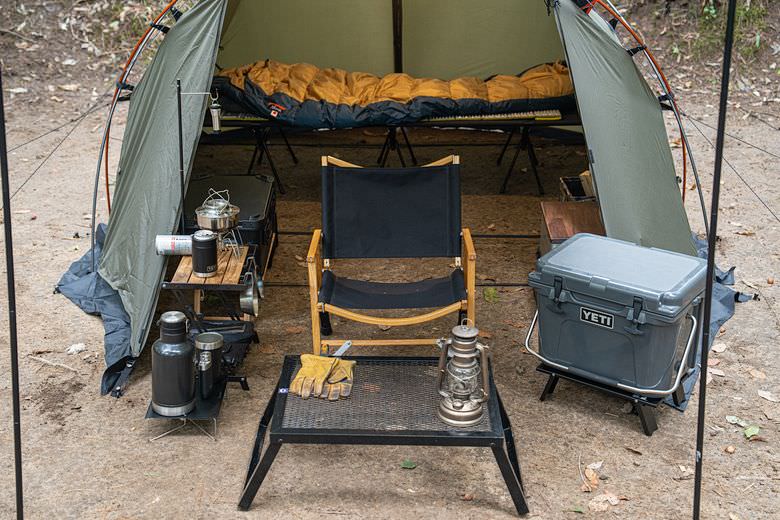
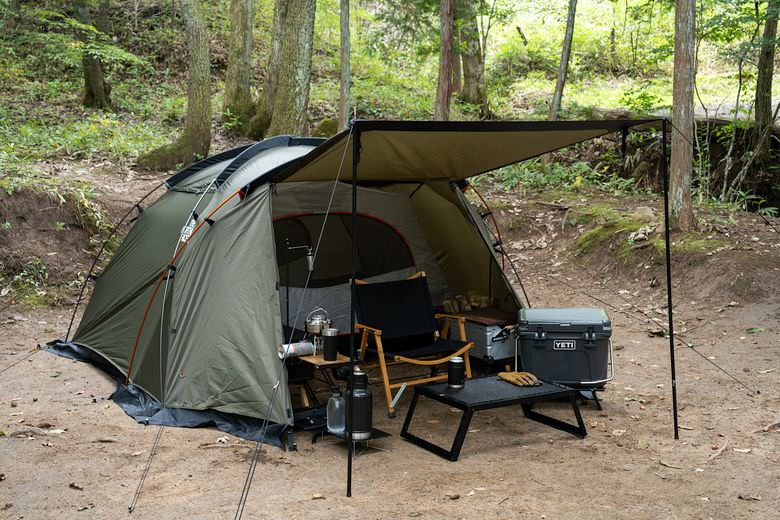
前室
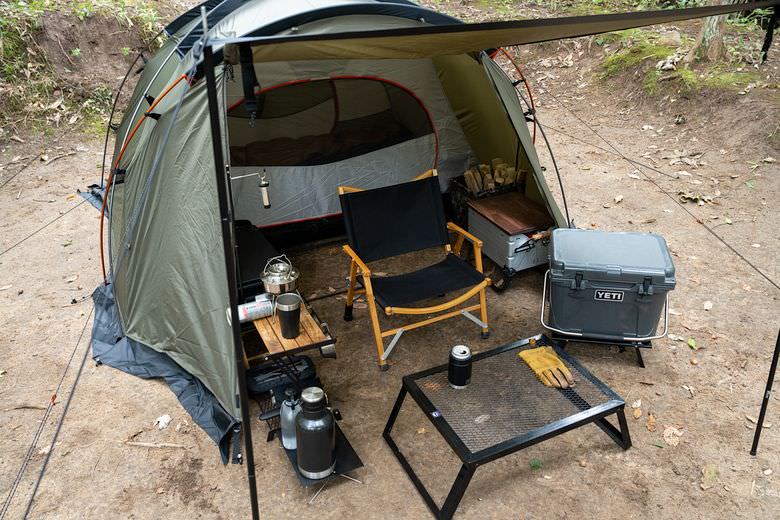
前室もこれだけ道具を並べられる広さがあります。
キャノピーを跳ね上げればタープは不要。
タープを買うお金や設営の手間を削減できるのは非常に大きなメリットです。
たろー特にソロキャンプはできるだけ設営の手間を省きたいですよね!
アウトフレーム構造でシェルターとしても使える
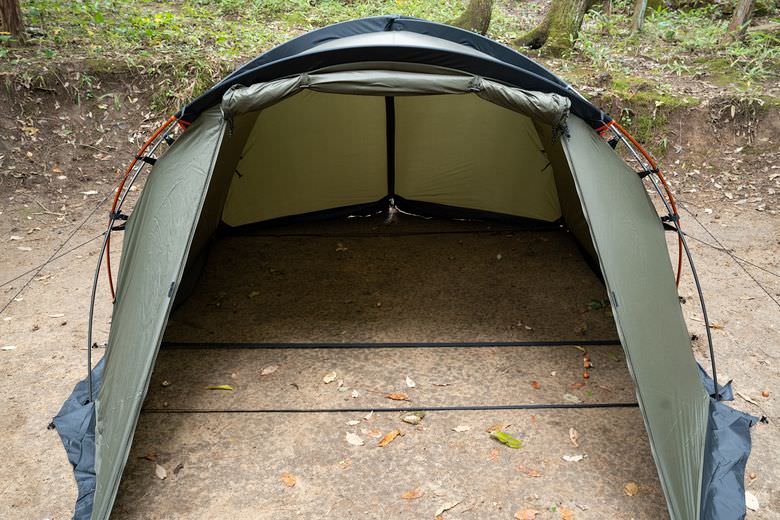
そして、これが僕がランダー2を購入した最大の決め手でもありますが、インナーを外して単体のシェルターとしても使えます。
ランダー2はアウトフレーム構造のインナー吊り下げ式なので、ツーリングドームのようなインナーテントをフレームで立ち上げてフライシートを被せる構造のテントと違って、インナーを外せます。
このおかげで、フロアレスのシェルターテントとしても使えるわけです。
僕はソロキャンプではサーカスTCやパップテントなどのシェルターテントを好んで使っていて、それは以下のメリットがあって快適だからです。
- 設営が簡単(インナー設営の手間がない)
- 空間を自由に使える
- テントへの入出時に靴を脱がなくて良い
- コット泊なら寝床にも困らない
シェルターテントはこのようにメリットがたくさんあるし、見た目的にもカッコよさが増します。
虫が出るシーズンはインナーテントを付ければ良いので、シェルターにもできるのは非常に大きなメリットです。
オールシーズン対応
そして、ランダー2はオールシーズンに対応しているのも魅力です。
使い方でも紹介した通り、前後を開放できてベンチレーションも付いているので、夏キャンプでも涼しく過ごせます。
さらにスカート付きでスノーガードにもなるし防風性も高いため、フルクローズすれば冬キャンプでも暖かいです。
たろーこういったオールシーズンで使えるテントは使用機会が多くて素晴らしい!
ザ・ノースフェイス「ランダー2」のデメリットをレビュー
ランダー2はソロ用のドームテントとして僕の中で割と理想的で、特筆すべきデメリットは今のところ見当たりません。
ただ、一部デザインが残念に感じたポイントがあるのでそれを書きます。
たろーここは完全に個人的な好みの話なのでご了承ください!
個人的にデザインが惜しい部分がある
ランダー2のデザインは基本的にカッコいいのですが、いくつか微妙に感じるポイントがあって実に惜しいです。
オレンジの刺し色がいらなかった
フロントポールのみカラーがオレンジで、個人的にこれは好きじゃないです。
ここも他のポールと同じグレーで良かったし、ポールを通す部分の区別のためのカラー分けならブラックが良かったです。
こういった刺し色はノースフェイスらしさでもあり、これが好きな人も多いので野暮なのは承知のうえですが、このオレンジが苦手で購入を断念した人も多いのでは?とも思うところ。
たろー僕は自分でブラックに塗装しようか迷ってます!
インナーテントのデザインがイマイチ
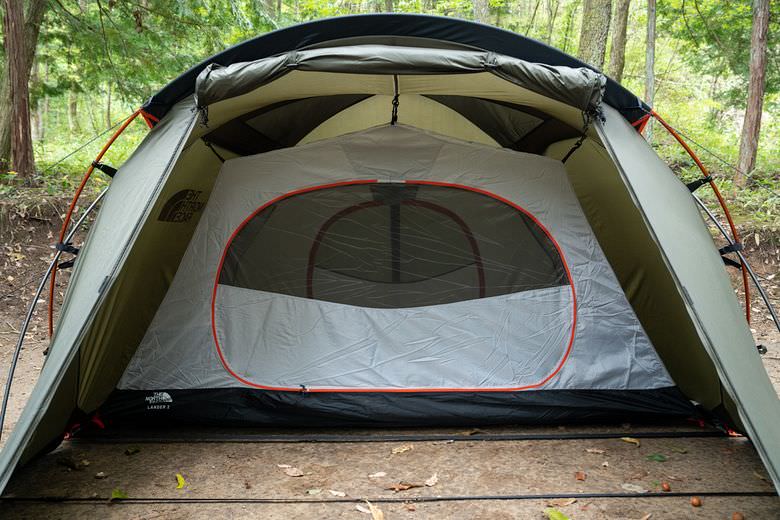
そして、インナーテントのデザインがイマイチに感じます。
ここもオレンジが気になるのもそうですが、せっかくカッコいいデザインのテントなのにインナーは可愛いというか柔らかいというか、そんな印象です。
どうでしょう。
僕は断然インナーなしの雰囲気の方が好きです。
正直、僕は購入前からインナーのデザインについては微妙と思っていたので、シェルターとして使うのを前提で購入しました。
夏場もインナーを付けるのではなく、テンマクデザインのモノポールインナーテントをインすると思います。
 たろー
たろーそれならフットプリント買わなくて良かったな!笑
ザ・ノースフェイス「ランダー2」はこんな人におすすめ!
ランダー2はカッコよくて他人と被りにくいドームテントを探しているソロキャンパーやデュオキャンパーにおすすめです。
ノースフェイスのテントは使ってる人が比較的少なくて被りにくいのは見逃せないメリットですね。
あとは設営も簡単でオールシーズン使えるので、キャンプデビューに選ぶテントとしてもおすすめできます。
たろーそしてやっぱりシェルターとして使えるのが最高すぎます!
【まとめ】ザ・ノースフェイス「ランダー2」をレビュー
ノースフェイスのテント「ランダー2」を詳しくレビューしました。
デザイン・居住性・機能性の三拍子が揃っていて、実際に使ってみたら本当に使いやすい素晴らしいテントでした。
価格も高すぎず、ドームテントとしては現状トップレベルにおすすめできます。
たろー何度も言いますがシェルターにできるのが最高だから、ぜひ使ってみてください!